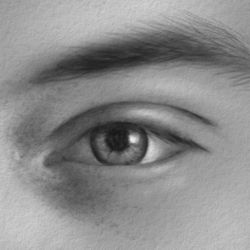
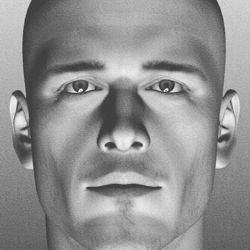
Charcoal Portraits - How to Draw the Eyes
This lesson illustrates and explains the step by step techniques used to draw the eyes with charcoal and chalk.
It is best to begin any portrait with the eyes as they are the focal point and most revealing feature of the face.
-
They are the key to the success of the work.
-
If you get them right at the start, it boosts your confidence for the rest of the portrait.
-
If you get them wrong and have to start again, you have not wasted time drawing the rest of the face.
Drawing the Eyes: Step 1
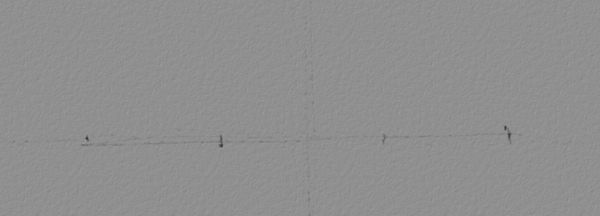
Establish the distances across and between the eyes
The first marks that we make in our charcoal and chalk drawing are the distances across and between the eyes.
Drawing the Eyes: Step 2
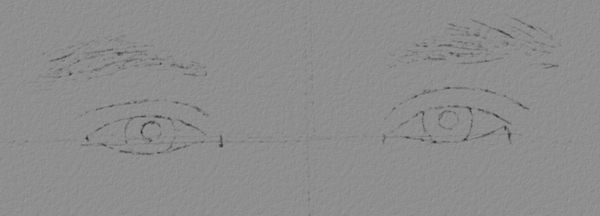
Lightly draw the shape of the eyes in line
Next we draw the shapes of the eyes and eyebrows in line.
-
We take care to observe any subtle variations in the symmetry of the eyes. It is these small differences that will help us capture the unique likeness of our sitter.
-
Pay particular attention to drawing the circles that form the iris in each eye. Note how they disappear beneath the eyelids, slightly more under the top lid than the bottom.
-
Don't be tempted to outline the shapes of the eyebrows. It is better to gradually build up their forms in lines that follow the direction of their growth.
Drawing the Eyes: Step 3
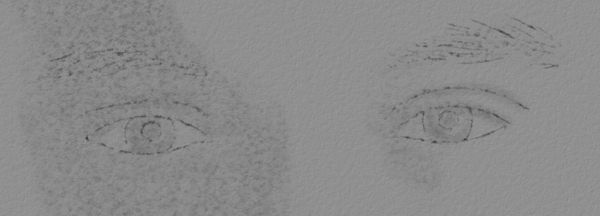
Softly smudge in the areas of dark tone
At this stage we begin to embed the eyes into the form of the face by establishing the general tones in and around them.
-
This is done by lightly shading the darker areas of tone with soft strokes from a charcoal stick. We then blend these with a tortillon (paper blending stump), a tissue or a finger which both lightens and merges the areas into a unified tone. A tortillon can be sharpened to a point and is ideal for smaller details, whereas a tissue or your finger is more efficient for larger areas.
-
It is best to apply your tones lightly as it is easier to darken them when you come to balance the elements of the drawing at a later stage. It is always more difficult to lighten a dark tone than it is to darken a light tone.
Drawing the Eyes: Step 4
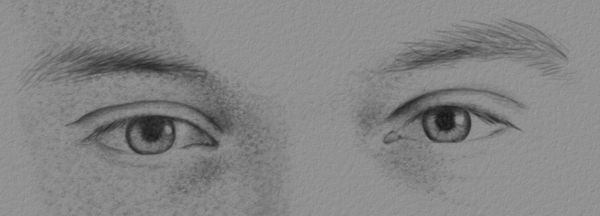
Start to pick out the details with a charcoal pencil
Now we begin to pick out the details of the eyes, eyelids and eyebrows with a sharp charcoal pencil, using the same technique as traditional pencil drawing.
-
Start to build up the darker details leaving any lighter areas, such as the highlights on the skin and reflections in the eyes, the natural mid-tone of the paper.
-
These highlights and reflections will be heightened with white chalk in the final stage of the drawing.
Drawing the Eyes: Step 5

Adjust and balance the tones and details
At this point we need to adjust and balance the details more accurately with their surrounding tones.
-
This requires that we look again at our subject, searching for the darker tones and details that we ignored on our first look.
-
Drawing is essentially a process of observing and recording what we see, but we never get all the information we need in a single glance.
-
First, we need to look and register what we see. Then we need to look again to discover what we missed.
-
In due course we continue this process until we are happy that we have recorded and balanced all the elements of line, shape and tone that we see in our subject.
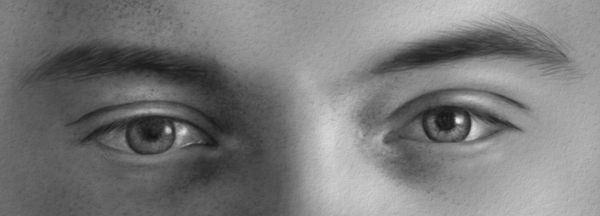
Drawing the Eyes: Step 6
Add highlights with white chalk
Applying the final highlights with white chalk is the most exciting part of drawing with charcoal and chalk. It is the missing element that brings your drawing to life.
-
For drawing the reflections in the eyes, you should sharpen your chalk to a fine point with a large pencil sharpener or craft knife.
-
Lightly shade the highlights on the skin and merge them with a blending stump, tissue or finger to suggest the natural form and glow of the complexion.
Drawing the Eyes: A Step by Step Summary
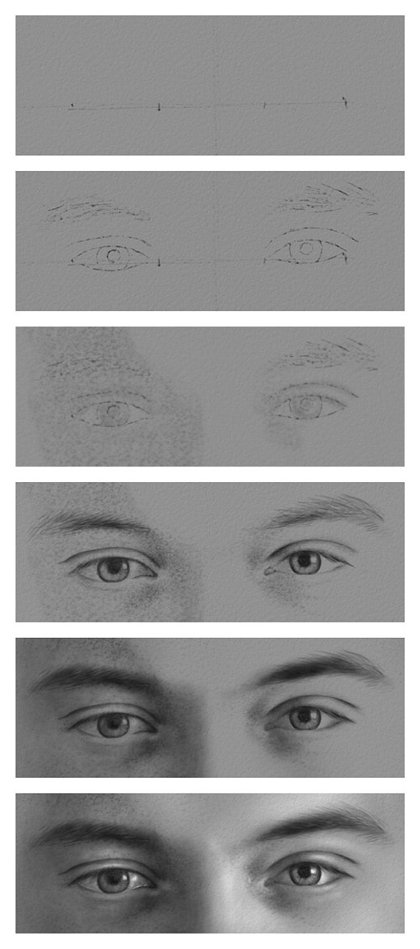
In our illustration you can see how our charcoal drawing is built up in a series of layers that gradually refine the line, tone and texture of the image to create a convincing representation of the eyes.