Drawing Charcoal Portraits
This lesson illustrates and explains the step by step drawing techniques used to create a realistic portrait with charcoal and chalk.
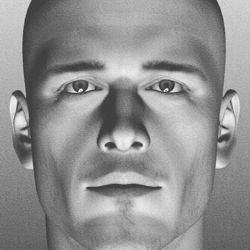
In this lesson we will guide you through a step by step tutorial that illustrates a classical approach to drawing a portrait of a young man with charcoal and chalk. Each stage of the drawing technique is carefully explained to help you understand the process of building a portrait, from those first uncertain marks to the polished highlights of the finished work.
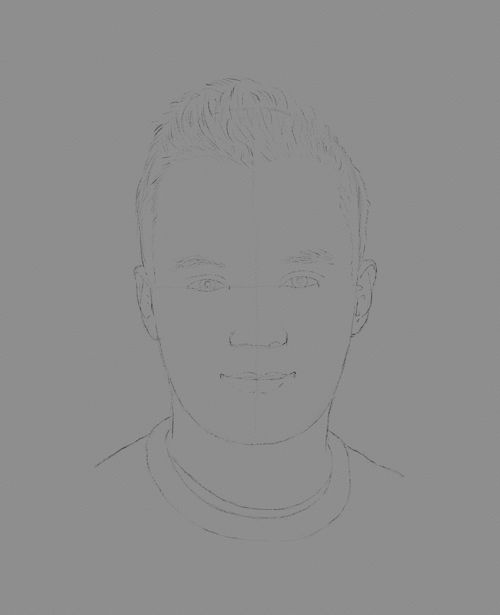
Charcoal Portrait Drawing - Step 1
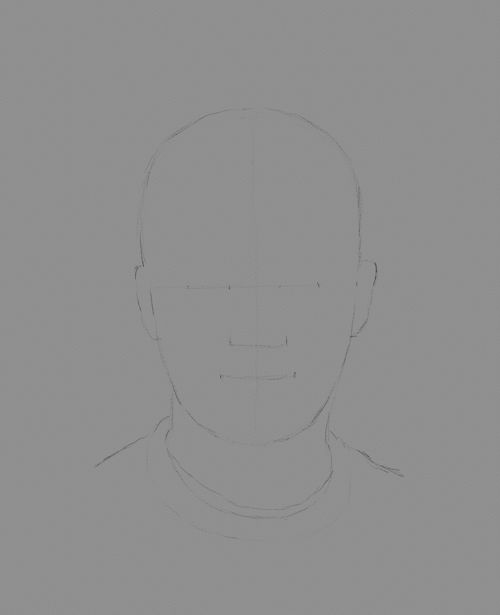
Establish the proportions of the face
A light grade charcoal pencil is the ideal medium for the initial stage of the line drawing.
-
As with any portrait, the first thing you do is to carefully establish the position of the head on the page and plot the proportions of the face.
-
Observing and measuring the precise relationship between the eyes nose and mouth is crucial to capturing an accurate likeness of your subject.
-
It is advisable to draw very lightly in the early stages of a charcoal drawing. This is the time you make the most changes to the image. It is also easier and cleaner to erase a lightly drawn line.
Some basic advice on drawing the proportions of a head can be found on the following pages:
Charcoal Portrait Drawing - Step 2
Outline the features of the face
When you are happy with the placement and proportions of the head you can begin to outline the features of the face in more detail.
-
Accurate observation is the key to achieving a good likeness in a portrait. What you are looking for is any subtle departures from the symmetry that you expect to see in a face. The ability to see such small variations of line, shape, tone and form is an essential skill for any artist.
-
At this point it is advisable to erase any lines of construction as these may cause smudges later in the drawing.
Charcoal Portrait Drawing - Step 3
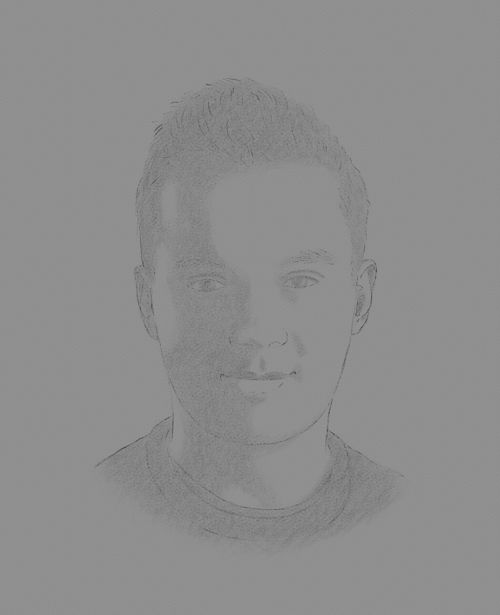
Introduce the basic tones of the face
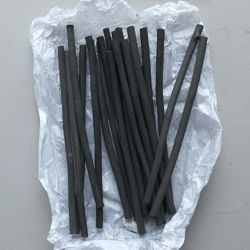
The most suitable medium for this stage of the drawing is a soft charcoal stick or crayon. This usually appears dark when you apply it but lightens as you smudge it over the surface of your drawing.
-
Once you have completed the line drawing of the portrait you are ready to introduce the basic tones of the face.
-
Your shading should be applied very lightly as you wish to build up to the depth of tone you desire. This requires a careful approach, trying to avoid any unnecessary erasing which could compromise the fine quality of finish you are aiming for.
-
If you sketch a few delicate lines with soft charcoal, you can blend them into a flat area of tone using either your finger or a paper blending stump.
-
The best way to observe the basic tones of your subject is through partially closed eyes. This reduces the amount of detail you are able to see and emphasizes the broad areas of dark and light.
Charcoal Portrait Drawing - Step 4
Start to develop the tones and details of the face
Now you should return to using a sharp charcoal pencil to pick out the main features of the face. A fixative spray will also prove useful to protect your work from smudges.
-
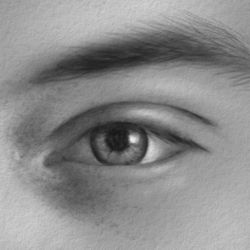
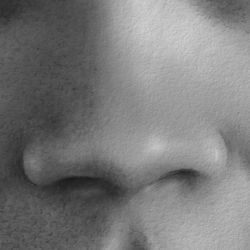
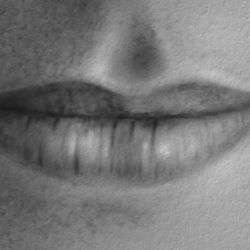
This stage of the drawing involves looking closely to discern some of the darker tones of the eyes, nose, mouth, ears and hair. Here you are trying to establish a few key features that you can use as a foundation on which to build the tonal structure of the face.
-
Building up the tones and details of the face requires a cautious step by step approach, gradually feeling your way rather than trying to get there fast.
-
Drawing details with a charcoal pencil is much the same as using an ordinary pencil. The main difference is the darkness of the charcoal pigment which makes it easy to overwork your drawing and therefore requires a more restrained approach. You will also find that you have to sharpen your pencil more often to capture any intricate details.
-
At the end of this stage you should spray what you have drawn with fixative to prevent smudges when you work over it in the later stages.
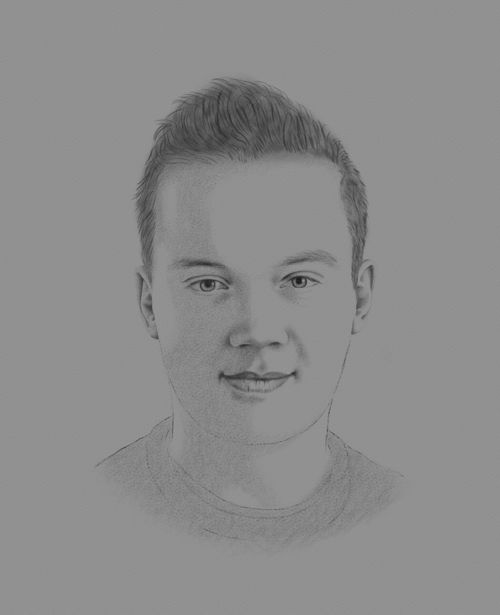
Charcoal Portrait Drawing - Step 5
Strengthen the tones of the face
This stage requires the use of a soft charcoal stick or crayon, a sharp charcoal pencil, a blending stump and a fixative spray.
-
When you start to strengthen the details of the features, you also have to deepen the surrounding tones to balance the overall shading of the head.
-
You begin by looking closely at the shading you applied earlier to see what subtle variations of tone lie within these areas.
-
Some of the larger areas of tone around the forehead, cheeks, chin and neck should be gently darkened with graduated shading using soft charcoal and a blending stump.
-
Some of the smaller details around the eyes, nose, mouth and ears will need to be intensified to acquire that depth of tone which is always elusive in the earlier stages of a drawing.
-
Most of the smaller, sharper details should be gently blended into and balanced with the softer areas of tone that surround them.
-
Once you feel you have built up the tone of the face to the depth of form and sharpness of definition you desire, you should lightly spray your work again with fixative to protect it from accidental smudges in the later stages.
Charcoal Portrait Drawing - Step 6

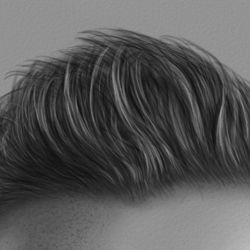
Deepen the tones of the hair
For drawing the hair, you require a soft charcoal stick or crayon, a sharp charcoal pencil, a blending stump, an eraser with a sharp edge and a fixative spray.
-
You can start by building up the strands and locks of hair with a hard charcoal pencil, using rhythmic lines that follow the style of its cut.
-
Once you have established its form in line, apply some fixative to avoid losing this detail at the next stage.
-
Now, using a soft charcoal stick and blending stump, you can smudge a layer of shading over the hair to enhance its volume.
Charcoal Portrait Drawing - Step 7

Refine the details of the hair
If you cut an eraser to form a sharp edge, you can use it to etch lines of light into the shaded hair. This is an effective technique for adding realistic detail and texture.
-
Use a sharp charcoal pencil in combination with your eraser to break up any lines of light that are too thick.
Charcoal Portrait Drawing - Step 8
Sketch the shoulders
For drawing the shoulders, you require a soft charcoal stick or crayon, a sharp charcoal pencil, a blending stump and a fixative spray.
-
When drawing a portrait, many artists choose to leave the shoulders unfinished as they feel that further detail may detract from the focal point of the face.
-
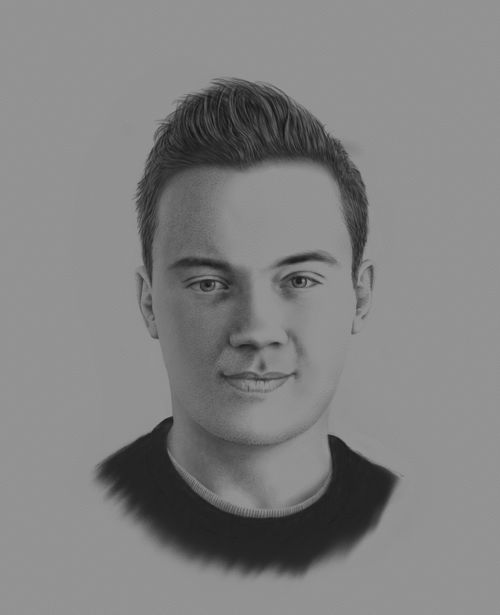
In our portrait we have drawn the subject's t-shirt in detail using a sharp charcoal pencil to define the ribbed texture of its neckline.
-
The subject's crew neck jersey is sketched more loosely, fading to a smudged edge of soft black charcoal.
-
In this case the unfinished shoulders of the portrait help to focus more attention on our subject's face.
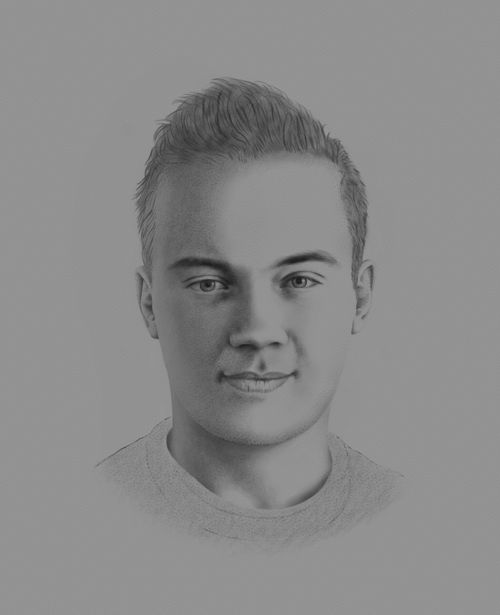
Charcoal Portrait Drawing - Step 9
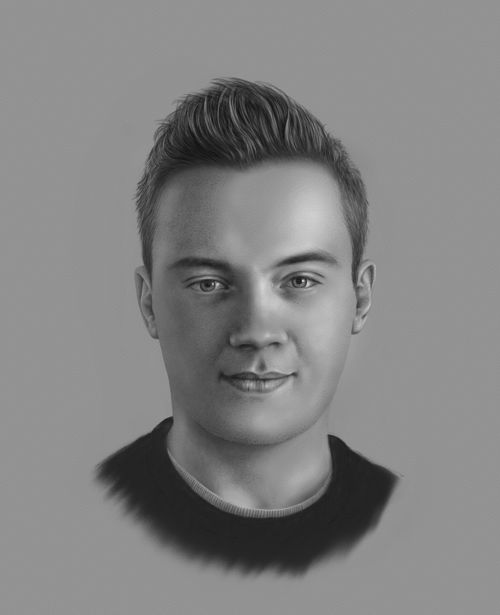
Highlight the skin tones with white chalk
For the final stage of your drawing you will need a stick of white blackboard chalk, a double hole pencil sharpener and a blending stump. It is best to use traditional blackboard chalk which is quite hard and opaque. It can be sharpened to a fine point using the larger hole of a double pencil sharpener.
-
When drawing with charcoal and chalk the most dramatic element is kept to last.
-
White chalk is is what we use to accentuate the effect of light on the skin.
-
It also balances the tone of the portrait. By this we mean that the three elements which combine to create the drawing (the dark charcoal, the light chalk and the mid tone of the paper) are carefully balanced in proportion to one another where no single element is too dominant.
-
Using white chalk to build up the effect of light on the skin is done in stages.
-
First, you look closely for any hints of light on the face of your subject.
-
Next, you gently shade these areas with chalk, softening and blending it into the surface of the skin with your finger or a blending stump.
-
As you blend the chalk into your drawing, the strength of its tone will naturally diminish and you will probably have to repeat the process to bring it back up to the level you desire.
-
You will find that some areas only need a light dusting of chalk while others have to be worked and reworked until you achieve brightness of highlight you are searching for.
-
Finally, when you finish applying the chalk you can spray your drawing with fixative to reduce the chance of smudges. However, by doing this you will probably also notice some reduction in the tonal contrast of the chalk which may require some retouching to bring the original level of contrast back. It is not uncommon to go through this process of fixing the medium and rebalancing the tone several times.