Pencil Portrait Drawing - How to Draw an Ear
This lesson illustrates and explains the step-by-step pencil techniques used to draw an ear.
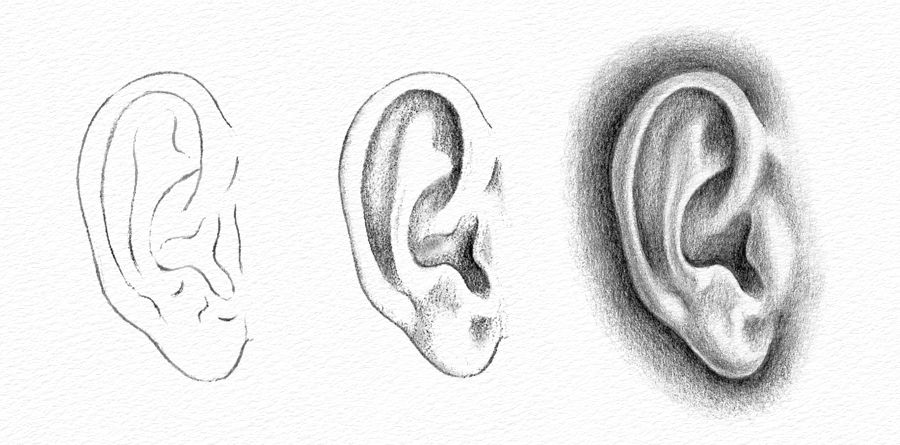
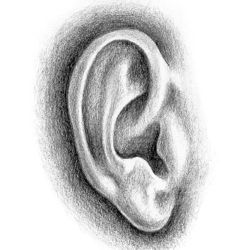
Our pencil study of an ear is broken down into three steps to help you understand each stage of the drawing process. We start with the initial line drawing, then work through the application of basic tones and finally refine the overall form of the ear with softly graduated shading.
How to Draw an Ear - Step 1
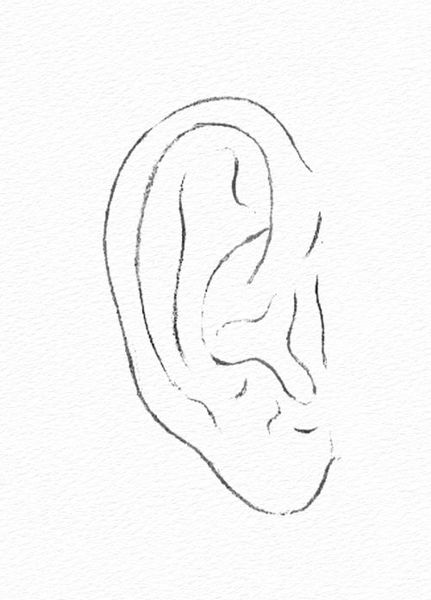
Step 1 - The Line Drawing
The ear is a complicated arrangement of ripples and folds of flesh.
-
You need to organise its irregular shape into some basic forms that are easier to outline.
-
You can then use this linear framework to gradually build up its complex form with tone.
How to Draw an Ear - Step 2

Step 2 - The Basic Tones
Simplify the tonal structure of the ear into three areas:
-
Areas that are mostly light - Leave these unshaded.
-
Areas that are mostly dark - Shade these with a mid-tone.
-
Areas that are extremely dark - Shade these with a dark tone.
How to Draw an Ear - Step 3

Step 3 - The Final Tones
Look deeply into each area of tone and try to pick up on the subtle variations that lie within.
-
You may have to darken some of the light areas and lighten some of the dark areas to achieve a balance of tone.
-
Tonal drawing is simply a balancing act between the elements of light and shade. In fact, all drawing is a constant balance between your observation, your concentration, your judgement and your technique.