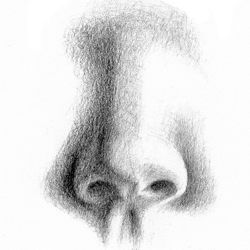
Pencil Portrait Drawing - How to Draw a Nose
This lesson illustrates and explains the step-by-step pencil techniques used to draw a nose.
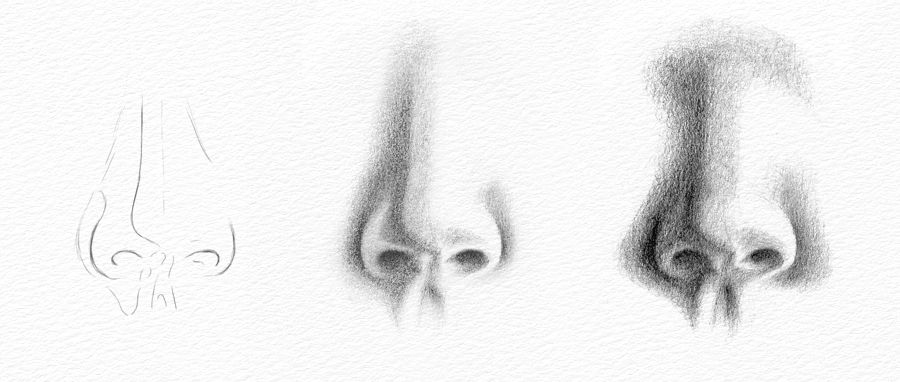
Our pencil study of a nose is broken down into three steps to help you understand each stage of the drawing process. We start with the initial line drawing, then work through the application of basic tones and finally refine the overall form of the nose with soft graduated shading.
How to Draw a Nose - Step 1
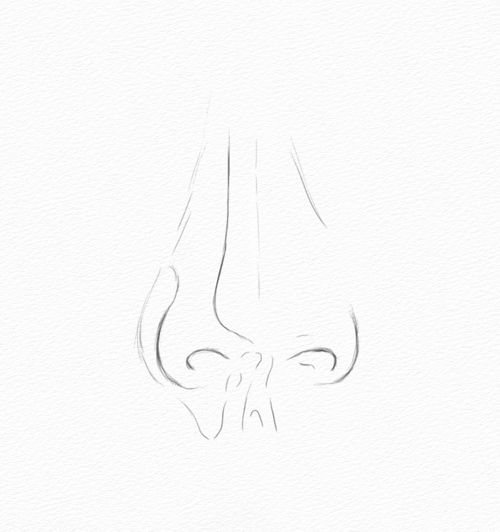
Step 1 - The Line Drawing
The nose is formed by a series of curved planes. This makes it difficult to draw from the front as there are very few lines to help us describe its shape.
-
Start by drawing what you can see, namely the inside and outside edges of the nostrils. Then try to outline the main areas of tone that define the planes of the nose.
-
Draw these lightly as you want them to disappear under your shading at a later stage in the drawing.
How to Draw a Nose - Step 2

Step 2 - The Basic Tones
Next, simplify your shading into three basic tonal areas - dark, medium and light (the white of the paper).
-
Block in each plane of the nose with its appropriate tone. This should begin to render its three-dimensional form.
How to Draw a Nose - Step 3
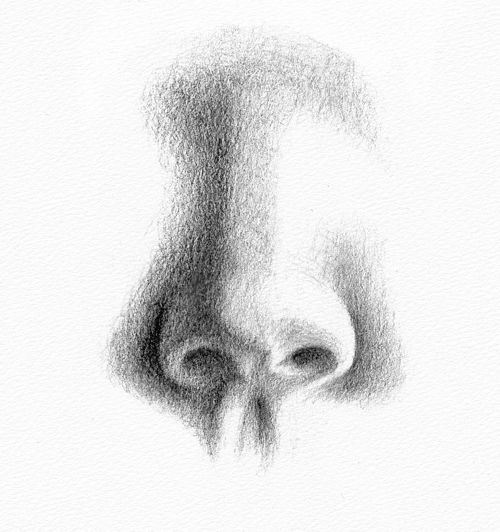
Step 3 - The Final Tones
Finally, refine the strength and subtlety of the tone, carefully softening the lines that join each plane with graduated areas of shading.
-
You must look more closely at this stage to try to discern the faint variations of shading within each area of tone. It is this close observation that will take your drawing to the next level.