Painting a Tree in Summer
In this lesson we demonstrate the process of painting a tree in full bloom at the height of summer.

- Painting a Tree in Summer
- summer-tree-10
Painting a Tree in Summer
- summer-tree-1
Paint the sky first
- summer-tree-2
Add some high-level clouds
- summer-tree-3
Add some low-level clouds
- summer-tree-4
Paint the foreground next
- summer-tree-5
Vary the tones in the foreground
- summer-tree-6
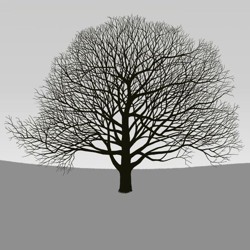
Paint the flat shape of the tree
- summer-tree-7
Add some light and texture to the trunk
- summer-tree-8
Paint a base layer of dark leaves
- summer-tree-9
Apply clusters of light leaves to create the form of the foliage
- summer-tree-10
Tie the tree down with a shadow
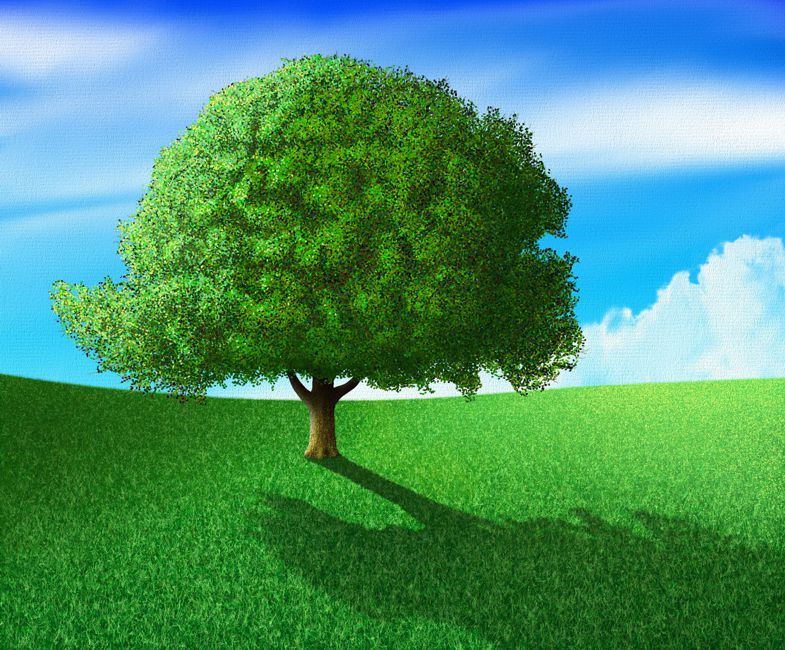
Our slide show illustrates a step-by-step process for painting a tree bathed in sunshine at the height of the summer. The tree is based on the example developed in our lesson on 'Painting a Tree'.
-
When you begin a painting, an organized method of approach is important as it helps you to tackle the work with some degree of control and confidence. Our slide show guides you through such an approach that you may adapt to your own style and technique.
Paint a graduated sky first

If you want to paint a tree in any season, it helps to add some context with a relevant background that identifies the weather at that time of year. This starts with the sky which establishes the mood of the painting.
-
To begin we have painted a cloudless summer sky that changes from a deep to a pale azure blue. This slow graduation of tones suggests an atmospheric haze that evokes a sense of depth and distance (aerial perspective).
Add some high-level clouds

Using the clear blue sky as a background, we softly brush and blend some high-altitude clouds which create a visual 'ceiling' at the top of the painting and redirects our eye downwards.
Add some low-level clouds

To increase the illusion of depth in the sky we have added some lower-level clouds which appear closer to the viewer due to their sharper definition.
Paint the foreground next

To start the foreground, we have used a flat earthy green as the base color of our meadow.
-
The addition of stippled brushstrokes in a brighter green adds some texture and aerial perspective to the scene.
Vary the tones in the foreground

To enhance the texture and perspective of the meadow, we have built up the density of stippling, gradually reducing the size of the brushstrokes to convey the illusion of distance.
-
We have also adjusted the luminosity of the color towards the horizon, brightening it on the right and darkening it on the left. This variation of tone strengthens the three-dimensional form of the background and sets the direction of the light source.
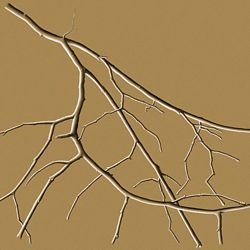
Paint the flat shape of the tree

Now that the foreground and background are established, it is time to paint our tree.
-
For a detailed account of how we built up the flat image of this tree please look at our page on how to paint a tree.
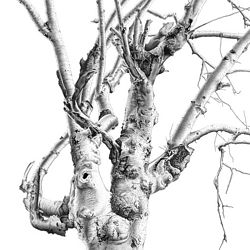
Add some light and texture to the trunk

Next, we add some shading to the trunk to build up the solidity of the tree.
-
There is no point in shading the branches as most of them will be hidden by the luxuriant mass of leaves that grow in the summer.
Paint a base layer of dark leaves
When we start painting the foliage we load the branches with a mass of dark leaves which will provide a shaded base against which we can highlight the sections that catch the light.
Apply clusters of light leaves to create the form of the foliage
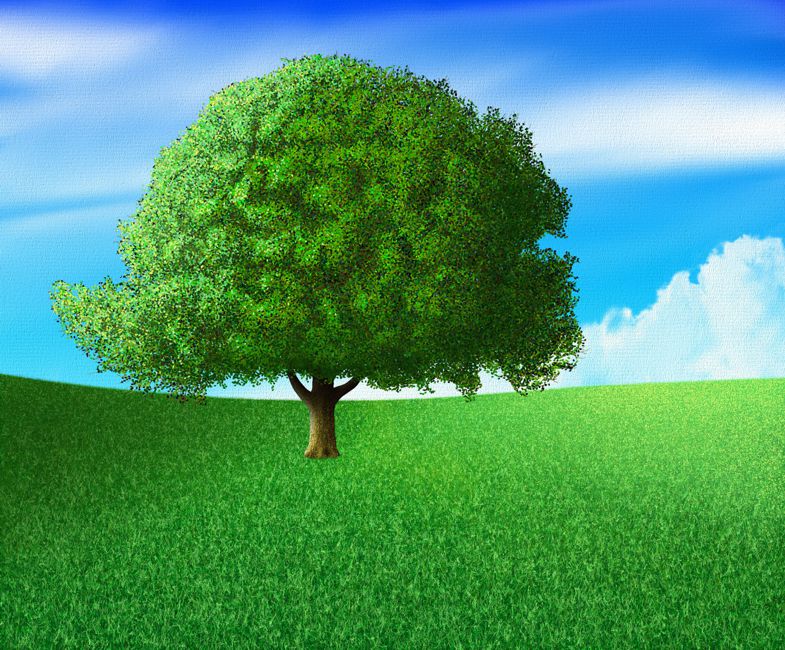
With the light source established on the left we begin to paint the bright leaves using light green and yellow stippling.
-
As we work across the tree, we can see clusters of branches that form irregular clumps of leaves.
-
Starting on the left with our brightest colors and heaviest concentration of brushstrokes, we gradually reduce their luminance, density, and definition to shape these outgrowths as they fade into the shade.
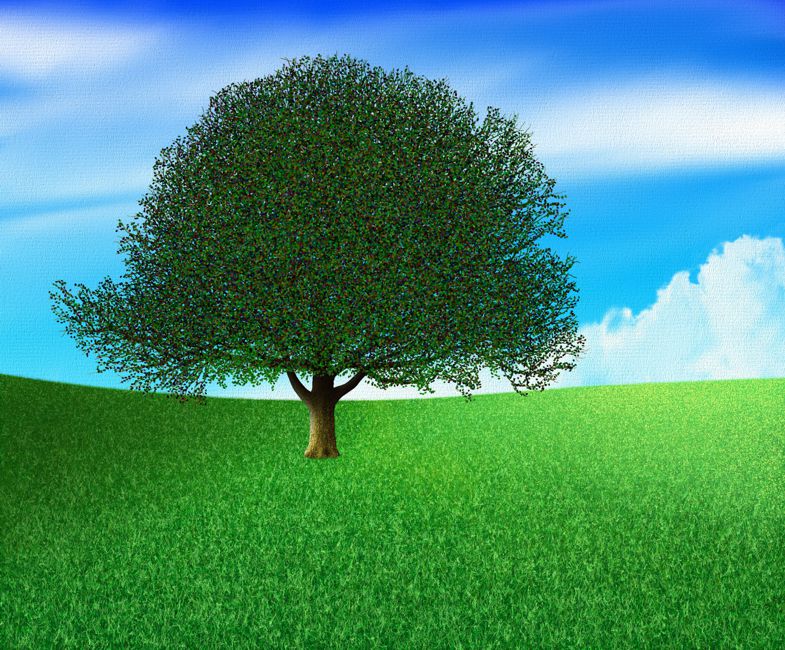
Painting a Tree in Summer - Finish by tying the tree down with its shadow
Finally we add the shadow cast by the tree to unify all the elements into one cohesive group.