Pop Art Group Project
Our Pop Art Group Projects are collaborative artworks for up to 20 people. Each participant completes a section of the image which is then assembled with the others to reveal a unique artwork.
Our Pop Art Group Projects are collaborative artworks for up to 20 people.
-
Unaware of the identity of the subject, each participant completes their own section of the portrait which is then assembled with the others to reveal a unique artwork.
-
The strength of this lesson lies in the fact that all of the participants, irrespective of their individual artistic abilities, contribute to the success of the entire project and consequently a sense of achievement is shared by all.
Step 1 - Creating a Template
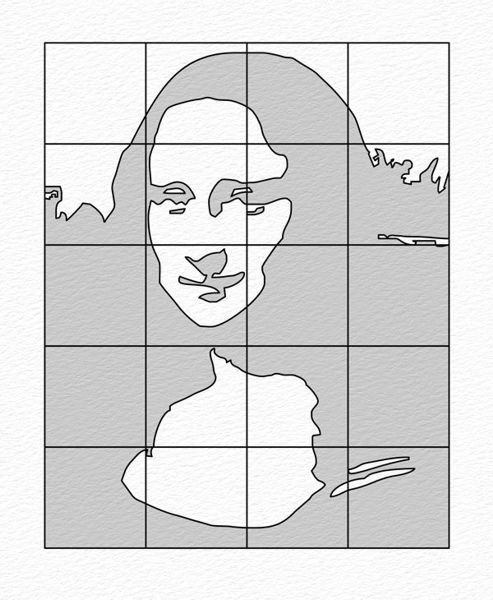
You start the project by creating a template image that measures 5X4 units. You can find out how to do this in our Pop Art Portrait Lesson.
Note: You also have the option of printing any of our ready-made portrait templates that you can access by clicking on the pop art portraits menu at the bottom of each page.
Step 2 - Cutting Up the Template
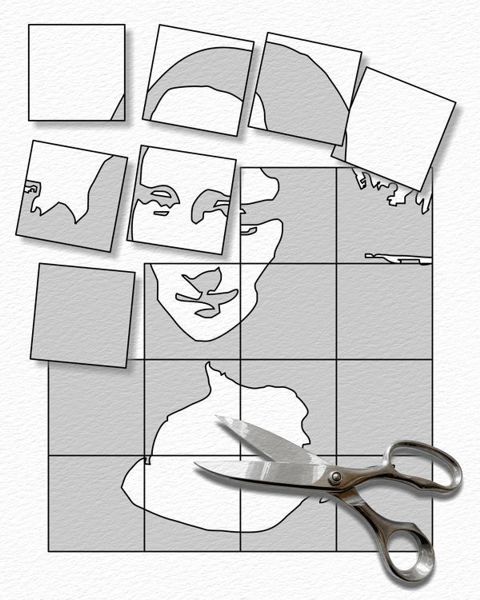
Next, you cut out the individual square sections of the template drawing and distribute them among the participants.
Step 3 - Coloring the Sections
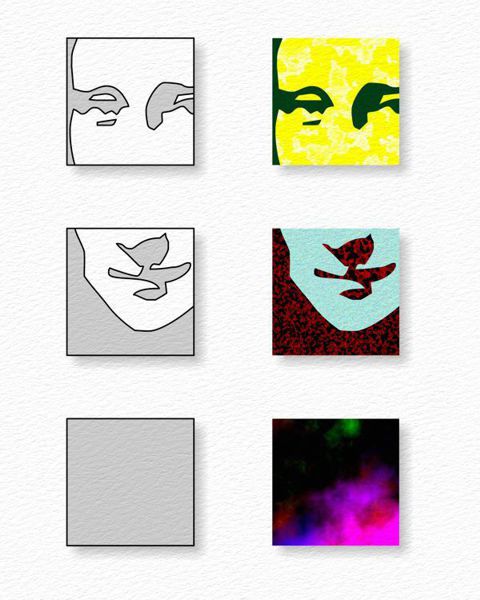
Each person then takes their individual template section and creates a color version.
-
It is important to use bright colors, patterns or textures for the light tones, and dark colors, patterns or textures for the dark tones.
-
Sticking to this rule will help you to keep a unified tone throughout the work and keep the image recognizable.
Note: The completed portrait can be a product of either design or chance:
-
Instructions or restrictions on the use of media or choice of colors can be agreed by the group in advance to creatively control the design of the final work.
-
However, the chance effects of random combinations of color, pattern and texture can also produce unpredictably good results.
Step 4 - Reconstructing the Image
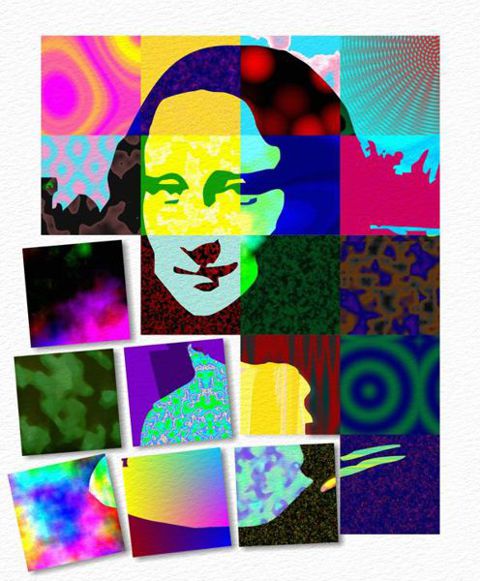
When all the individual sections are completed, they are arranged to reconstruct a colorful and surprising interpretation of the portrait.
Note: The surprise of the final result is increased if the participants are kept in the dark about the identity of the subject. It is always good fun discovering who it is as the image is rebuilt.
Step 5 - The Final Image
Finally, all the individual sections are glued down onto a large sheet of paper or card to complete our Pop Art Group Project.
Experiment with scale
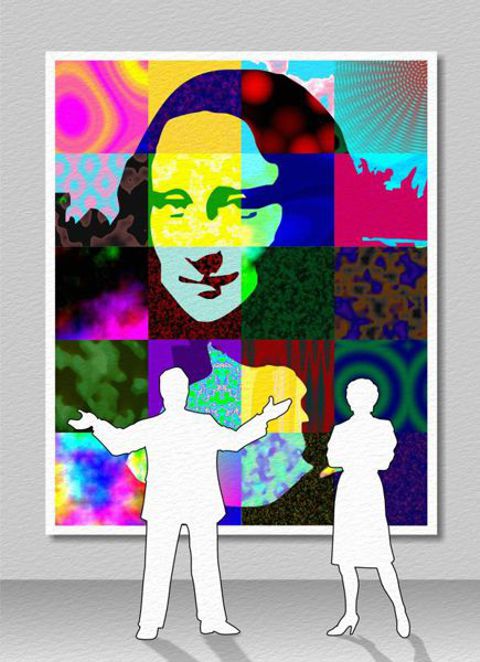
It is possible to increase the scale of the final work by making each section proportionally larger.
-
If each section was scaled up to 1 metre square, the final work would be 4x5 metres.
-
This is a good method for creating large scale artworks with a group of students.
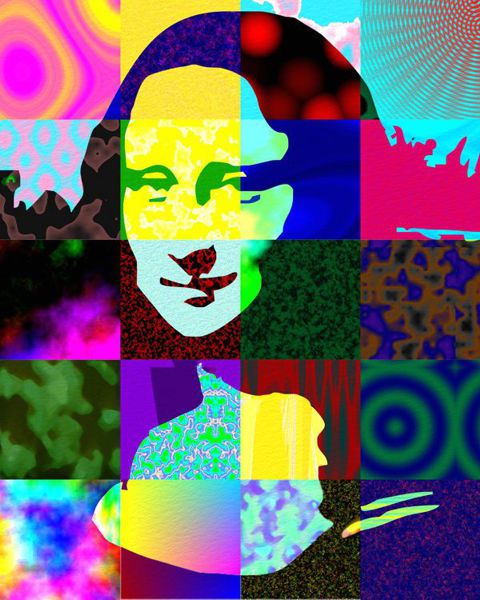
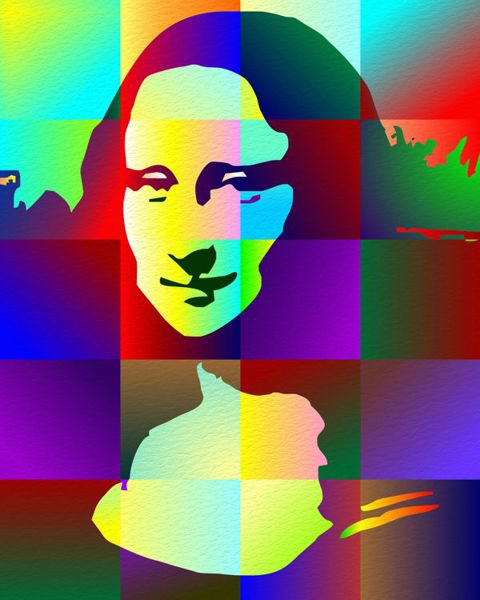
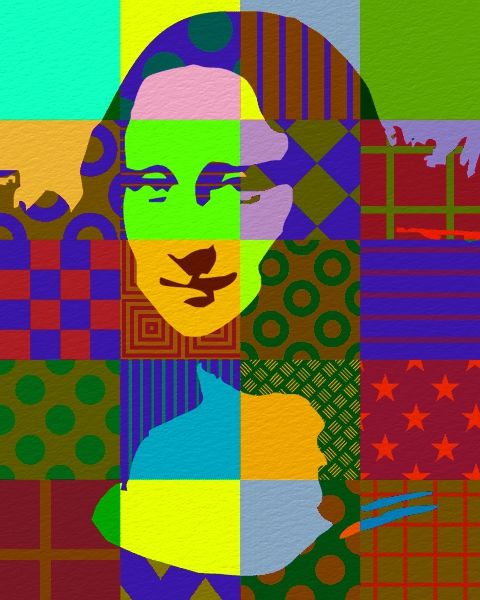
Pop Art Group Project Examples - Color

In this example of our Pop Art Group Project, each section was colored, using a palette of bright and dark colors relating to the tones of its corresponding template section.
-
Those sections which were indicated as skin were colored using a palette of different flesh tones
Pop Art Group Project Examples - Tones
In this example of our Pop Art Group Project, each section was shaded with either light or dark graduated colors relating to the corresponding tones of each template section.
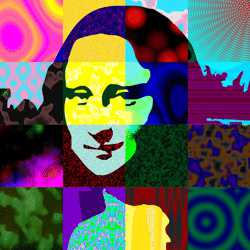
Pop Art Group Project Examples - Pattern
In this example of our Pop Art Group Project, the light areas of each section were colored with bright colors, whereas the shaded areas were filled with dark patterns.
-
In developing this example it was discovered that using patterns for both light and dark areas tended to camouflage the image.
Pop Art Group Project Examples - Texture
In this example of our Pop Art Group Project, the light areas of each section were colored with bright textures, whereas the shaded areas were filled with dark textures. Textures can be created with any wet or dry medium or can be collaged from photographic or printed materials.
These templates are free to copy and print to help you with drawing a Pop Art Portrait.