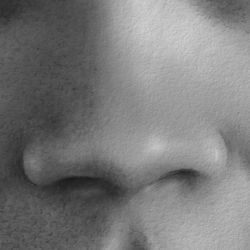
Charcoal Portraits - How to Draw the Nose
This lesson illustrates and explains the step by step techniques used to draw the nose with charcoal and chalk.
Drawing a nose with charcoal and chalk is naturally suited to the tonal qualities of this medium. Please follow the steps below to explore the process and techniques used to build up our charcoal and chalk drawing of the nose.
Drawing the Nose: Step 1
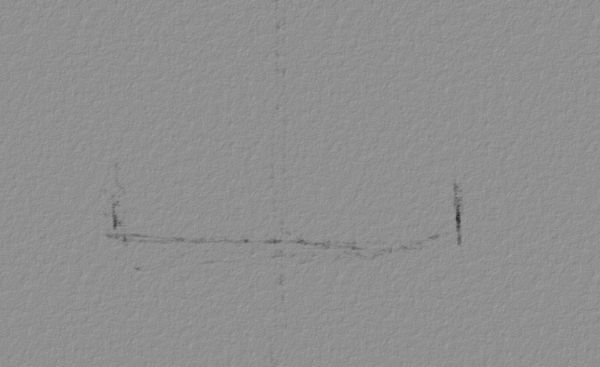
Mark the width of the nose
The first steps we take are to mark the base and width of the nose with a charcoal pencil.
You can find out more about drawing the basic proportions of a head and the position of its features at the following pages on our site:
Drawing the Nose: Step 2
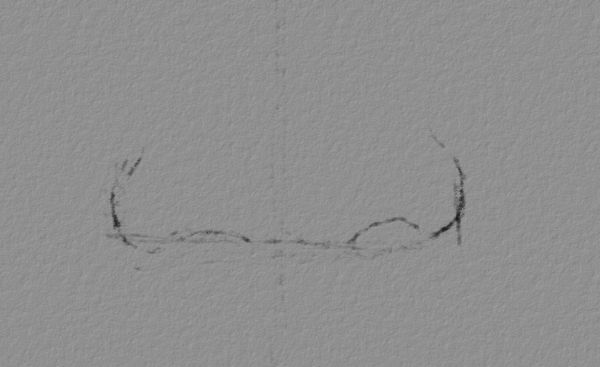
Outline the nostrils and sides of the nose
Next, we outline the sides and rims of the nostrils.
-
When you start a drawing you normally begin with lines that you use to construct the shape of the object.
-
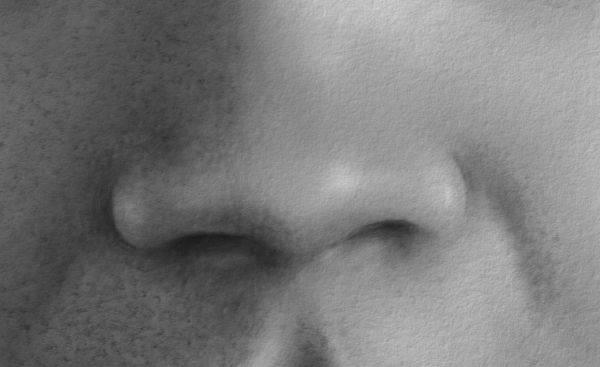
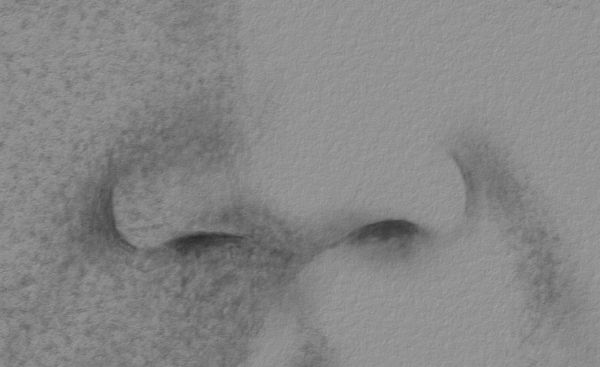
The difficulty with drawing a nose viewed from the front is that there are so few lines to help you create its shape. You are therefore more dependent on the tones of the nose to create its form.
Drawing the Nose: Step 3

Introduce the general areas of tone
At this point we introduce the general areas of tone that act as a foundation on which we can build up the form of the nose. For this we use a stick of soft charcoal which we blend with a tortillon (paper blending stump), a tissue or our finger to create a unified tone.
-
This is a tentative stage of the drawing where you have to work lightly and cautiously, continually checking on the accuracy of your observation.
Drawing the Nose: Step 4
Observe any variations of tone
Once we have established the general tones around the nose, we need to look again to discern any lighter, darker, distinct or indistinct variations of tone that lie within our drawing.
-
In this case the darkest and sharpest areas are the cavities of the nostrils, followed by the shadows cast by the sides of the nose. However, the soft tonal changes around these are of equal importance to the success of the drawing.
Drawing the Nose: Step 5
Refine and adjust the depth of tone
-
Here we look again at our drawing with a view to developing and enhancing the balance and contrast of tones.
Drawing the Nose: Step 6
Add the highlights with white chalk
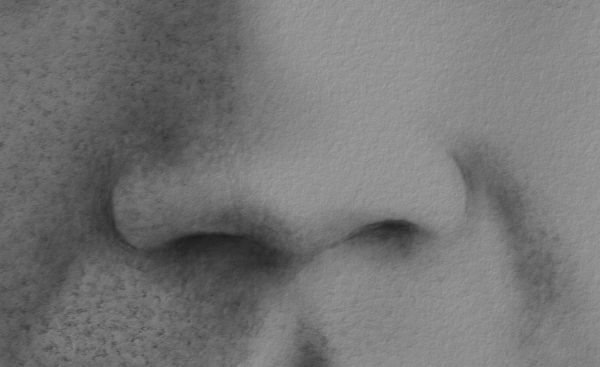
Once we reach the balance of tones we are looking for, it is time to apply the highlights with white chalk.
-
The chalk highlights are soft and subtly blended, adding a natural light, skin texture and form to the nose.
-
It is so easy to get carried away doing highlights as they are a such an effective addition to the drawing. You need to try to reign yourself back a bit and cautiously build them up to the level of brightness you require.
Drawing the Nose: A Step by Step Summary
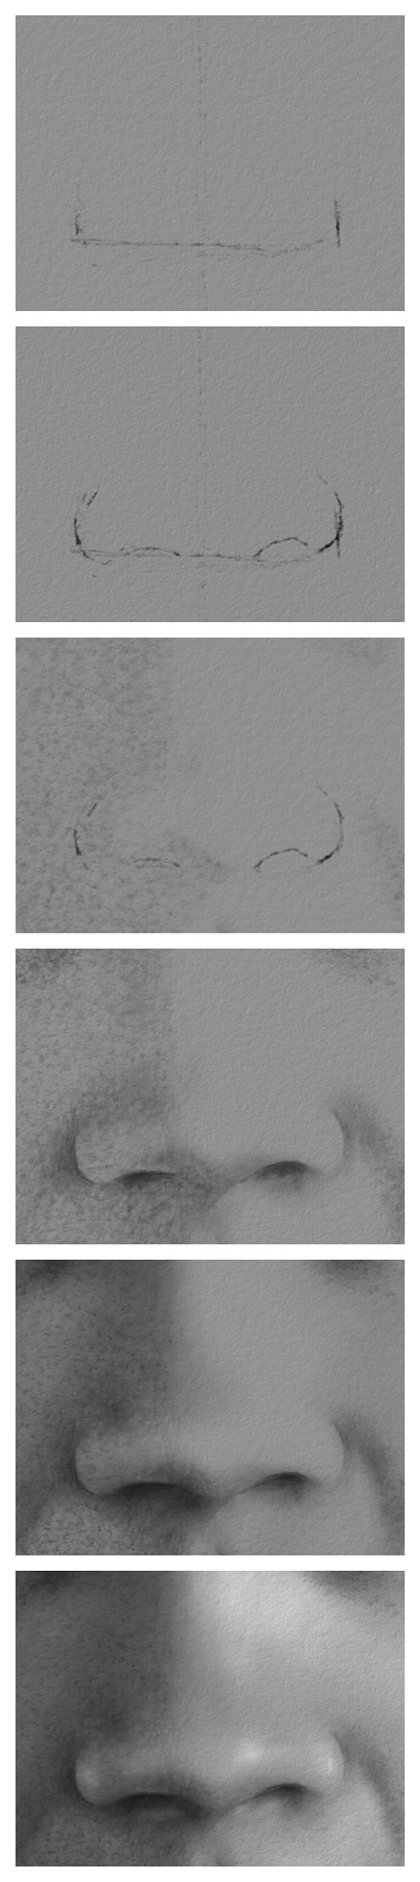
In our illustration you can see how our charcoal drawing is built up in a series of layers that gradually refine the line, tone and texture of the image to create a convincing representation of the nose.