Color Pencil Portraits - How to Draw the Nose
This step by step lesson teaches you how to draw a nose with color pencils.
Drawing a nose with color pencils presents some difficulties as there are few sharp lines to help define its form and several subtle changes of graduated tone necessary to make it convincingly project from the face.
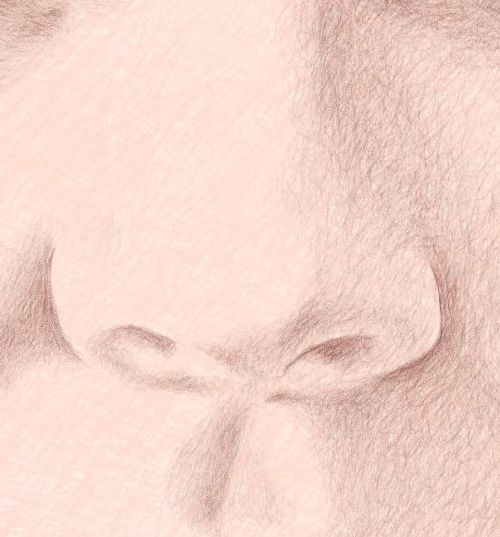
Drawing the Nose - Step 1
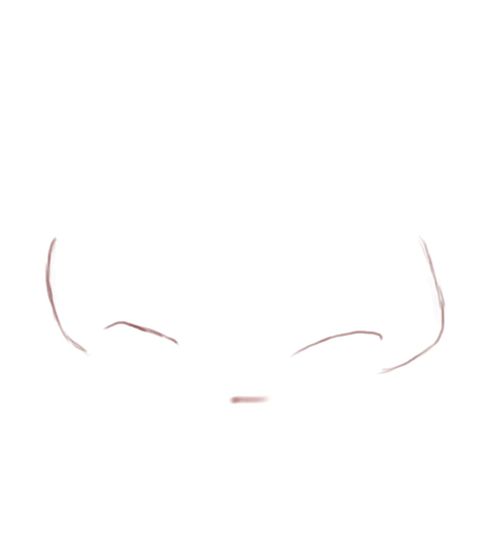
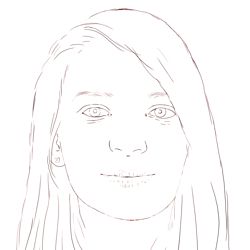
Draw the nose in line.
You start to draw the nose by establishing any outlines you can see.
-
From this frontal viewpoint, the only lines that are visible are the sides and rims of the nostrils.
-
Even although you may be drawing a small amount of detail you must always maintain your maximum level of concentration. For example, if you had failed to notice the slight asymmetry of the nostrils that occur in our subject, you would lose some of the likeness that you are searching for.
Drawing the Nose - Step 2
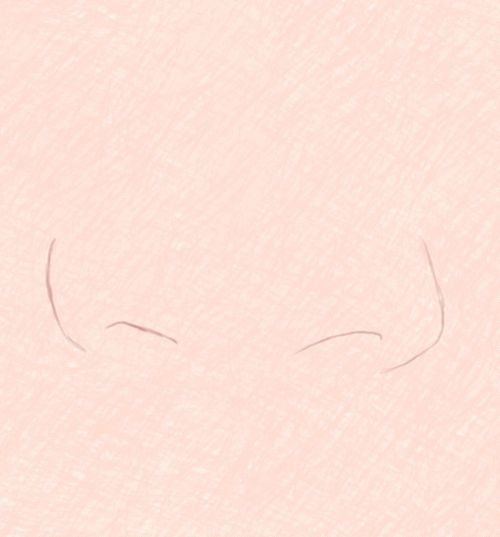
Shade with a light flesh color.
Next, you should evenly shade a light skin tone over your line drawing to establish a basic flesh color.
-
Try to select a color that is halfway between your dark flesh tones and the white of the paper.
Drawing the Nose - Step 3
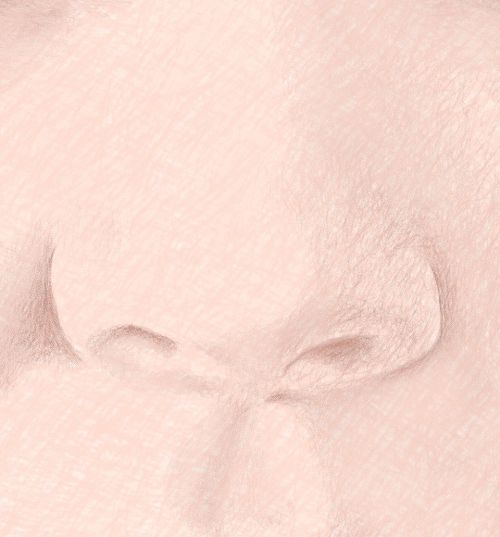
Build up the dark tones.
With such a small amount of information available in the line drawing, the shape of the nose will have to be created by carefully building up its tonal form.
-
To begin this process, you need to look closely and try to discern the main areas of dark tones.
-
Next, delicately shade these in with a color that is slightly darker than your basic flesh color.
-
Don't try to complete your shading in one go. You need to build up the depth of tone you require in several layers. This will allow you to control the quality of your shading as you add each layer.
Drawing the Nose - Step 4
Intensify the dark tones.
Now, look more deeply at the dark areas of tone in and around the nose of your subject.
-
Within these areas, search for those sections that are darker than your previous layer of shading.
-
Now adjust what you have previously shaded to include this range of darker tones.
-
If you do this carefully you will, as a matter of course, start to refine you shading as you become focused on adjusting any inconsistencies in the tone.
Drawing the Nose - Step 5
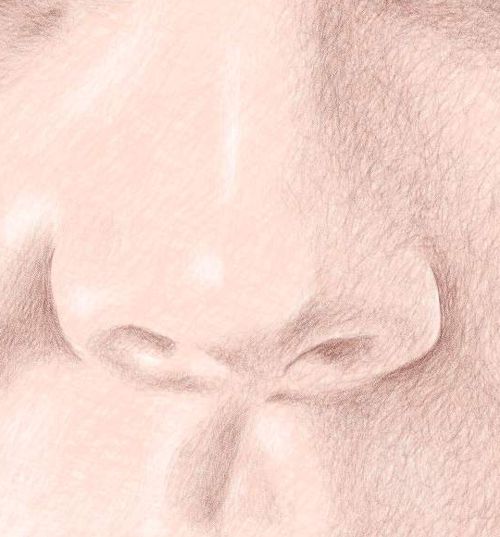
Add highlights with an eraser.
At this stage you should begin to establish the lighter tones in order to demonstrate the full tonality of the nose.
-
If you try to create light tones using a white color pencil you will find that it mixes with the color underneath to create a dull highlight. This has none of the sparkle that you get from the natural white of the paper shining through pure translucent color pencil pigment.
-
The best way to create the lighter tones on and around the nose is by drawing with an eraser to lift some of the color from the white page.
-
By by using an eraser to expose or partially expose the white of the paper beneath your color pencil shading, you can create a broad spectrum of light tones ranging from full blown highlights to subtle variations in the skin tone.
-
You can purchase precision erasers which are like rubberized propelling pencils and they are ideal for 'drawing' in a very controlled manner. Alternatively, you can use a craft knife to cut or sharpen your eraser to an accurate point.
Drawing the Nose - Step 6
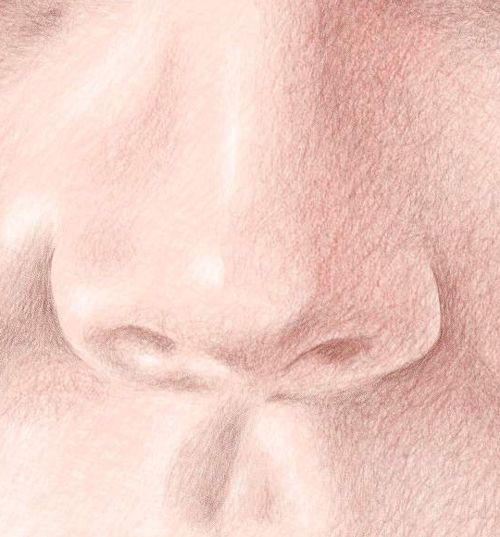
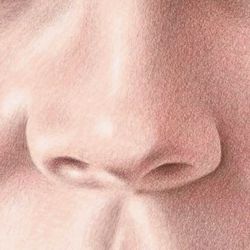
Add some warmer colors.
The skin is the largest organ in the human body. It blushes when we are embarrassed and flushes when we are hot. Its color and tone are subject to internal and external factors and change accordingly to reflect both psychological and environmental conditions.
-
In our subject there are delicate fluctuations in the skin tone where some areas of the nose seem warmer than others. We have cautiously applied a thin layer of red to capture these variations. This will also heighten the realism of our drawing.
Drawing the Nose - Step 7
Refine and strengthen your shading.
As you build up the tone of the nose you come to a point where you have to tidy up your shading.
-
The marks you make when you begin your shading are more sketchy and irregular.
-
When you add another layer to build up the tone, some of the unevenness of your shading is naturally smoothed out by the increased volume of pencil strokes.
-
This smoothing of the skin texture builds and improves with each subsequent layer.
-
However, there comes a point where you need to look very closely at the surface of your shading to unify the tone by lightly touching up any irregularities with sharply pointed pencils of the appropriate color.
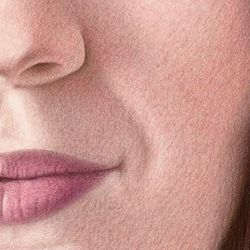
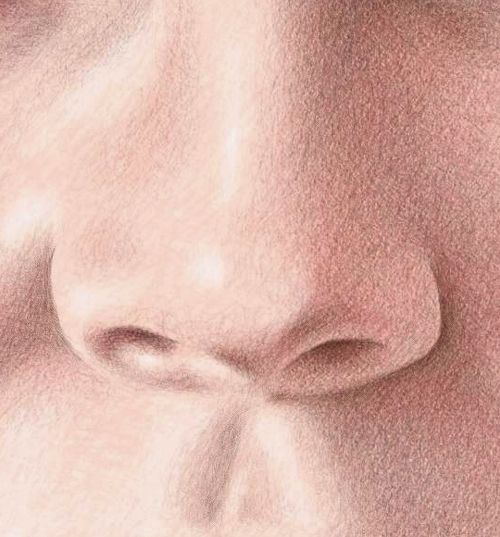
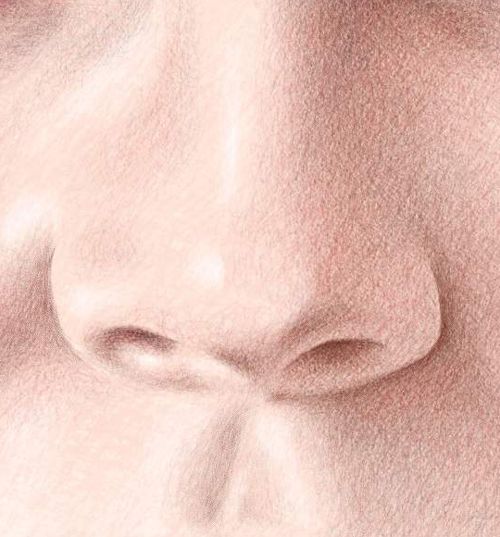
Drawing the Nose - Step 8
Balance and unify the skin tone.
Once you have gone through the techniques of refining, strengthening and unifying the skin tone, you can repeat the process in one final layer of shading.
-
The aim of this last step to fine tune the texture and tone of your shading for maximum impact.
A Step by Step Summary
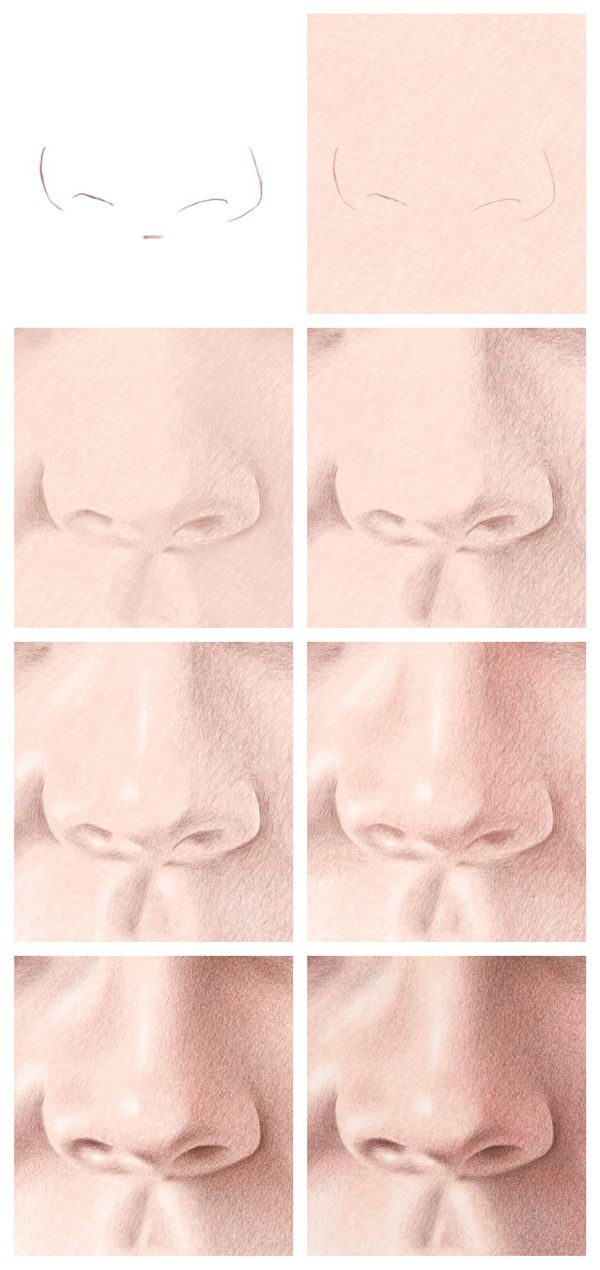
In our illustration you can see how our color pencil drawing is built up in a series of layers that gradually refine the line, color, tone and texture of the image to create a convincing representation of the nose.