Drawing a Cubist Still Life
This lesson demonstrates how to draw a Cubist Still Life that combines multiple viewpoints of the subject in a single image. Our step-by-step approach offers you guidance on the leap from realism to abstraction that we find in Cubist art. The lesson is divided into two sections: Part 1 focuses on drawing the shapes and structure of a Cubist still life; Part 2 deals with painting its arrangement of tone and color.

- Slide Show
- cubist-still-life-painting-7
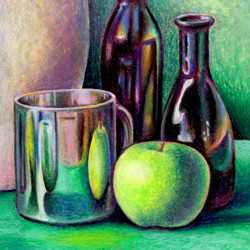
A Cubist Still Life
- cubist-still-life-drawing-1
The First Viewpoint
- cubist-still-life-drawing-2
The Second Viewpoint
- cubist-still-life-drawing-3
The Third Viewpoint
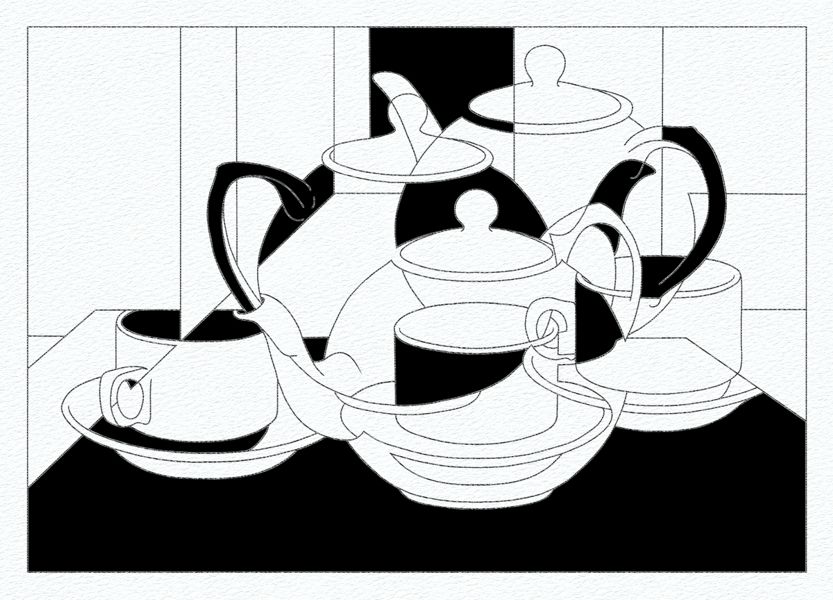
- cubist-still-life-drawing-4
The Master Drawing
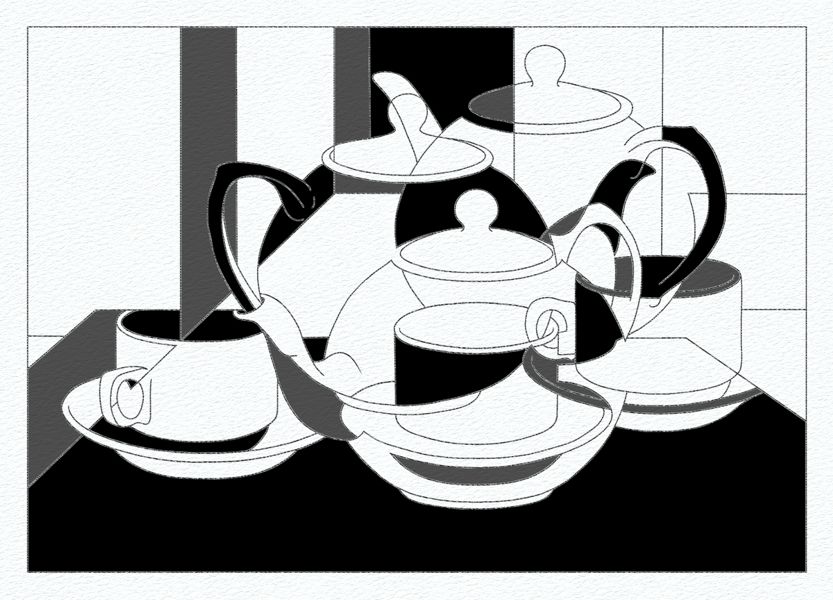
- cubist-still-life-drawing-5
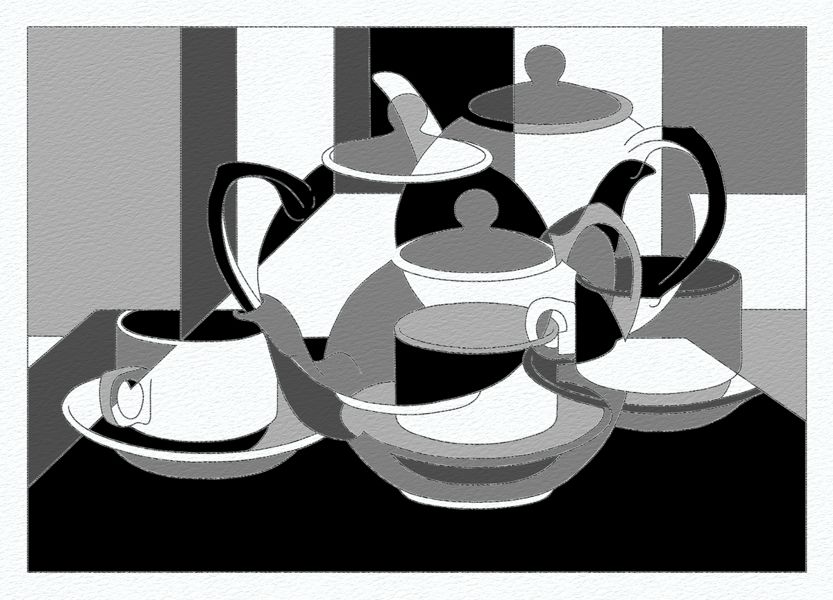
A Cubist Still Life Drawing
- cubist-still-life-painting-1
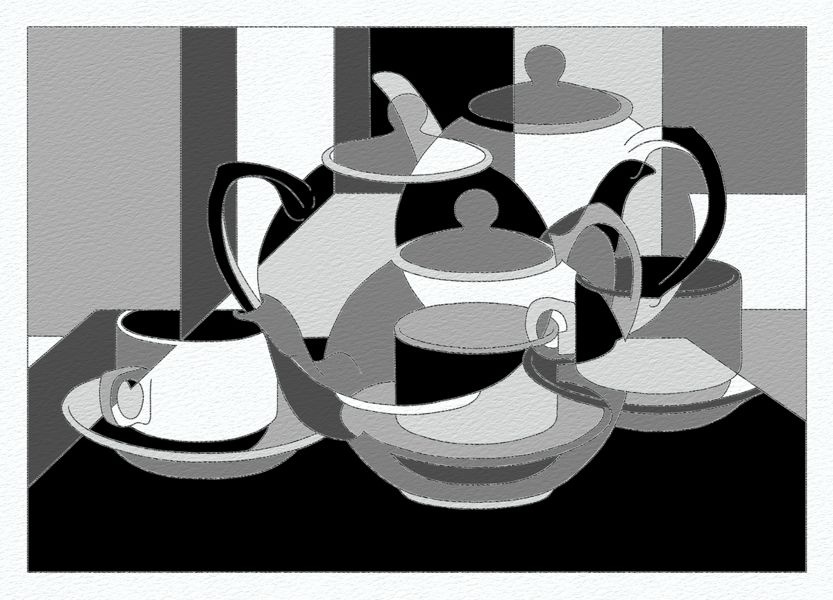
A Cubist Still Life Painting - Tonal Value 1
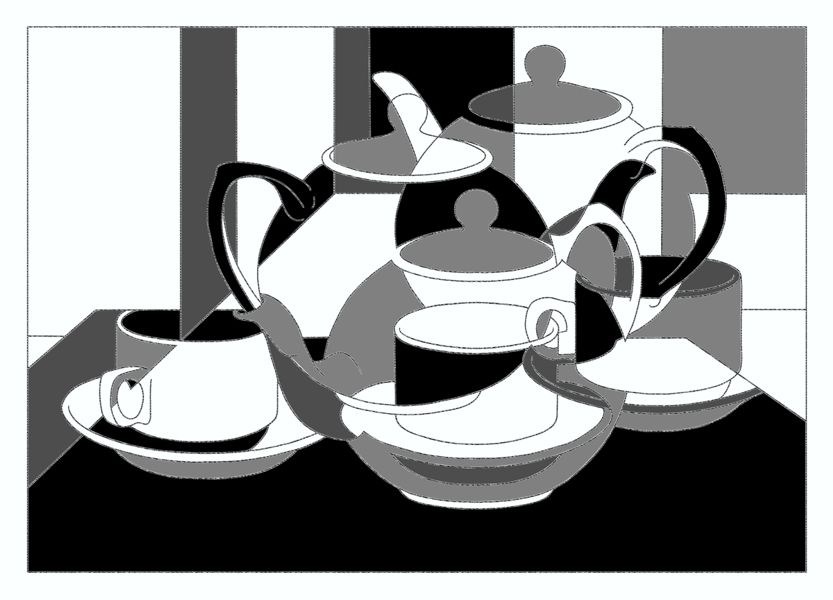
- cubist-still-life-painting-2
A Cubist Still Life Painting - Tonal Value 2
- cubist-still-life-painting-3
A Cubist Still Life Painting - Tonal Value 3
- cubist-still-life-painting-4
A Cubist Still Life Painting - Tonal Value 4
- cubist-still-life-painting-5
A Cubist Still Life Painting - Tonal Value 5
- cubist-still-life-painting-6
A Cubist Still Life Painting - Outlining the Tones
- cubist-still-life-painting
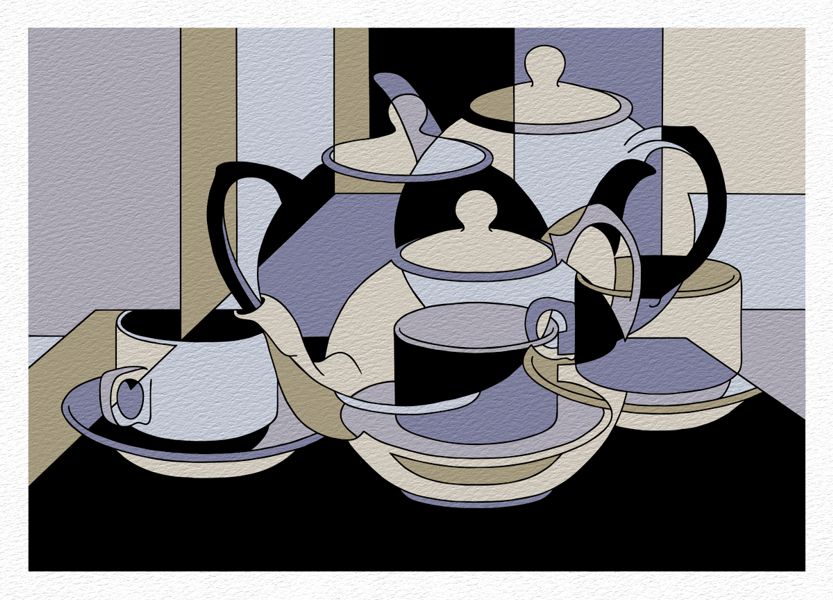
A Cubist Still Life Painting - Subdued Color Values
- cubist-still-life-painting-7
A Cubist Still Life Painting - Cool Color Values
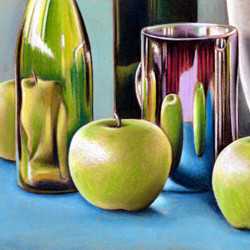
- cubist-still-life-painting-8
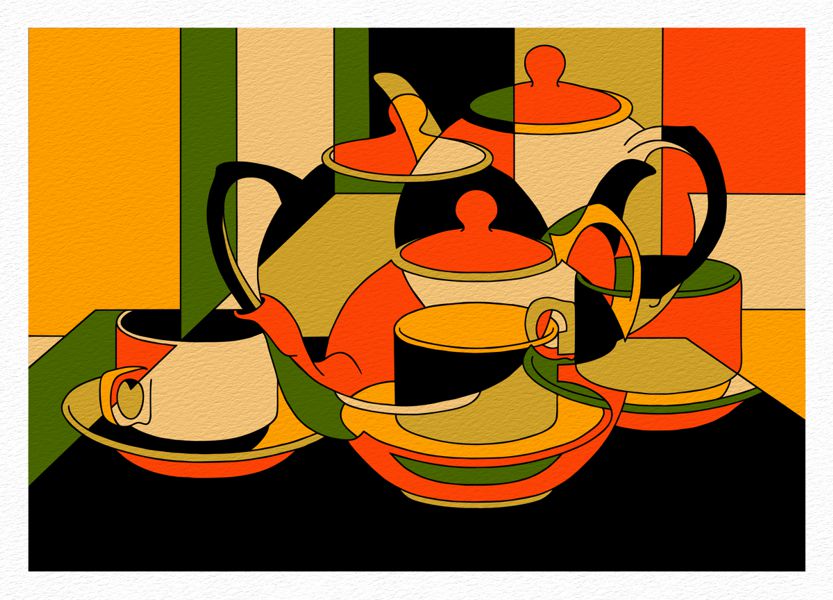
A Cubist Still Life Painting - Warm Color Values
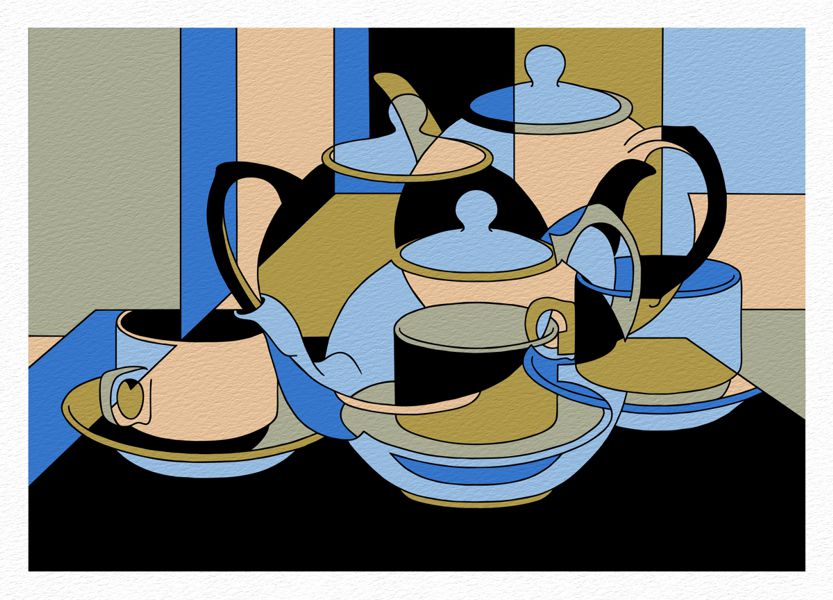
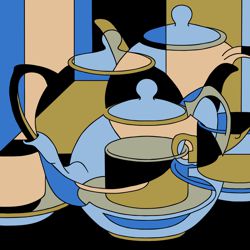
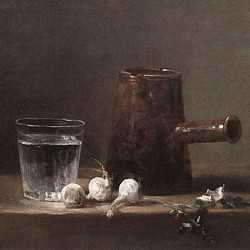
For our lesson on how to paint a Cubist Still Life, we chose a simple teapot, cup and saucer, which we drew from three different viewpoints and reconstructed into a composition of planes and colors.
-
Cubism was the first abstract movement of modern art and still life was its most popular genre.
-
When you paint an object in a Cubist still life, your perception of that object involves both observation and memory.
-
If you observe an object, your memory of it is not based on one fixed viewpoint as seen in a perspective drawing, but on several fragmented views that catch your attention as you move around it.
-
In a Cubist still life painting, these selected views become the elements of its composition. The front, back and sides of the subject become interchangeable and are rearranged in an abstract layout that reconstructs our idea of space.
The First Viewpoint
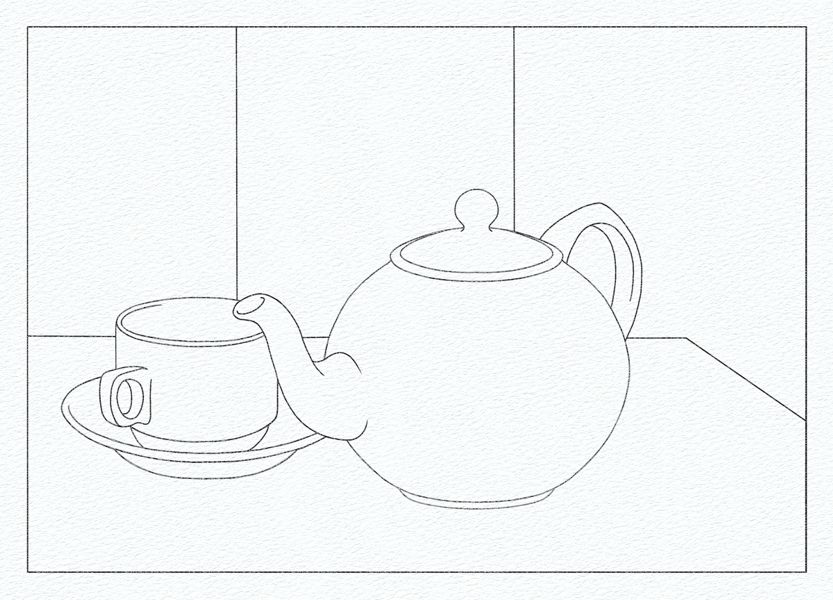
Start with a simple line drawing of your object(s) from a fixed viewpoint.
- It is best to choose one or two simple objects for your still life as the amount of detail rapidly increases as the lesson progresses.
The Second Viewpoint
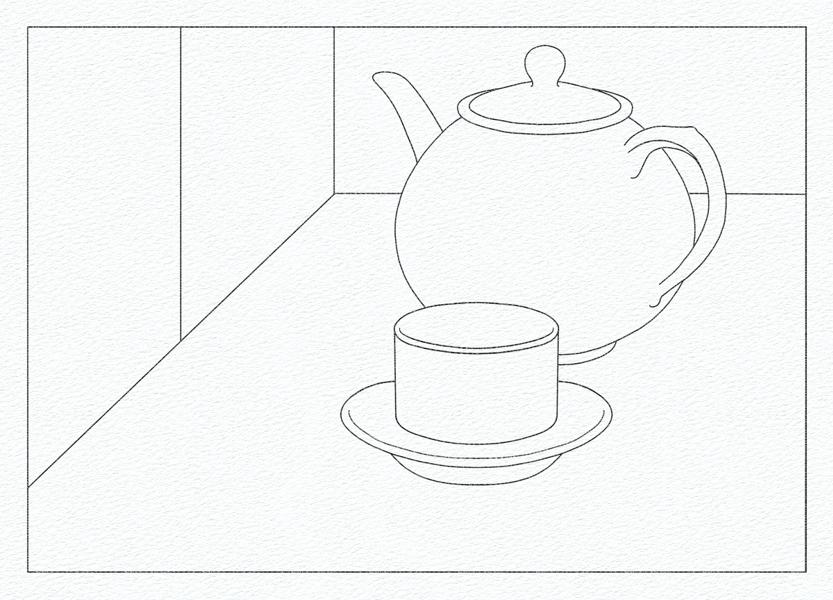
Next, using a sheet of paper the same size as your first drawing, rearrange the position of your objects and draw them in line from a different viewpoint.
The Third Viewpoint
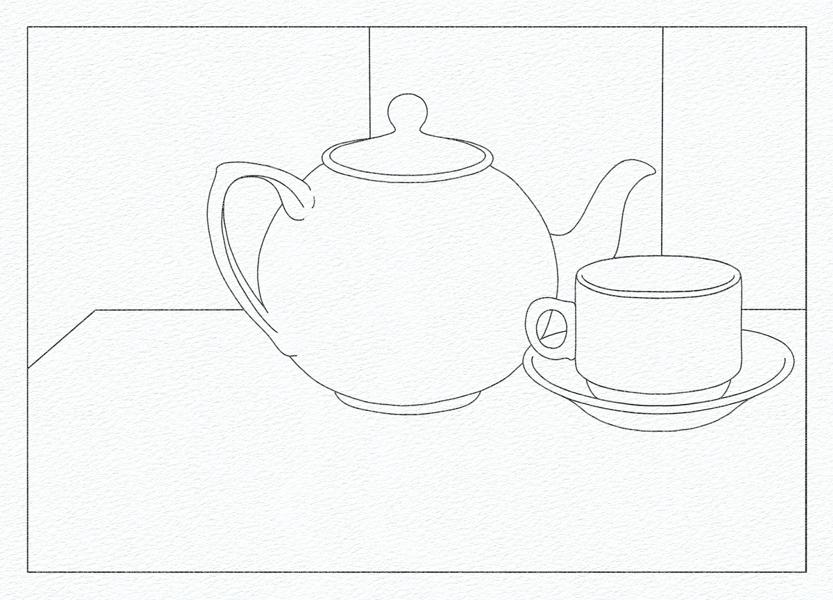
Using a similar format, continue to rearrange the position of your objects and draw them in line from a third viewpoint.
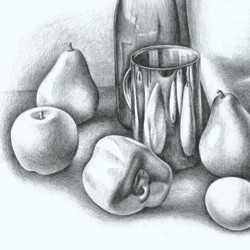
The Master Drawing
Finally, trace and transfer all three drawings onto the one sheet. This will become the master drawing that you will edit to construct your Cubist still life.
-
As the objects chosen for our still life are quite simple forms with little detail, we used three different viewpoints to create our master drawing. If the objects you choose have more complicated forms, you may only need two viewpoints to form your image.
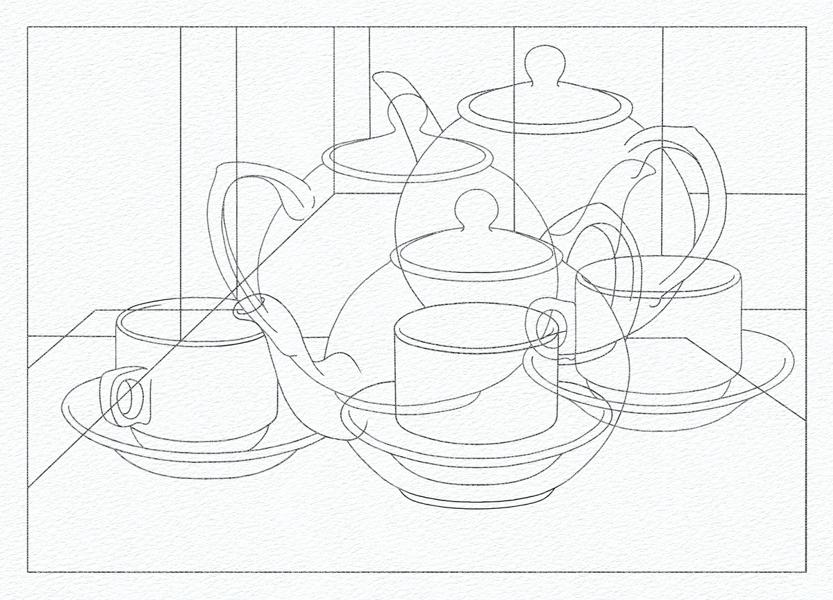
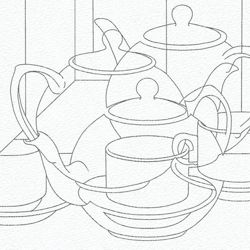
The Cubist Drawing Process
Click on the Flip Icon to reveal our Cubist Drawing
Once you create your master drawing from the various viewpoints you are faced with a complex network of lines that is difficult to read as an organized image.
-
The aim of this lesson is to extract (abstract) a more orderly image from the master drawing: i.e. a Cubist form whose elements combine all three views within a more structured arrangement.
-
This is done through a process of erasing selected lines to reveal details that hold some fragmented memory of the individual objects, and whose composition forms a structure that offers your eye a stimulating path around and through the still life.
-
Our illustration demonstrates the edits we have made to the master drawing to create our Cubist drawing.
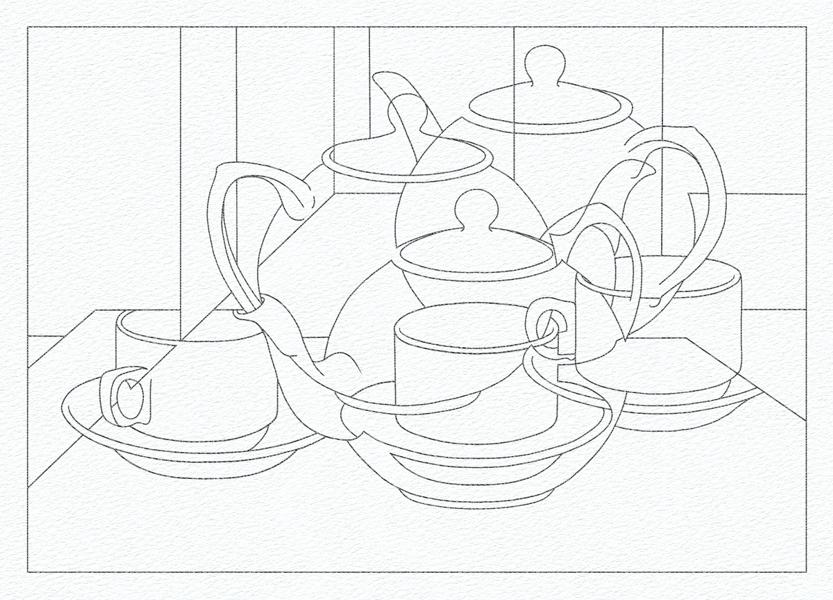
A Cubist Still Life Drawing
Our final drawing is an interwoven arrangement derived from all three views. This Cubist composition records key details of the objects, while altering their transparency, opacity, and spatial depth, in order to focus attention on the rhythms and harmonies of their intrinsic shapes.

