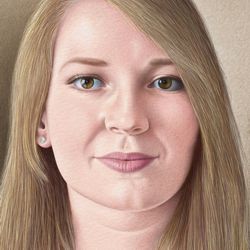
Color Pencil Portraits - How to Draw Clothes
This step by step lesson teaches you how to draw clothes with color pencils by shading light and dark tones to create the folds.
The clothes in our color pencil portrait are created with a simple step by step drawing technique.
-
They are initially shaded with flat colors which are then modified with light and dark tones to create the folds of their fabrics.
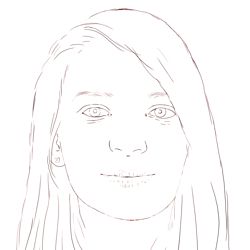
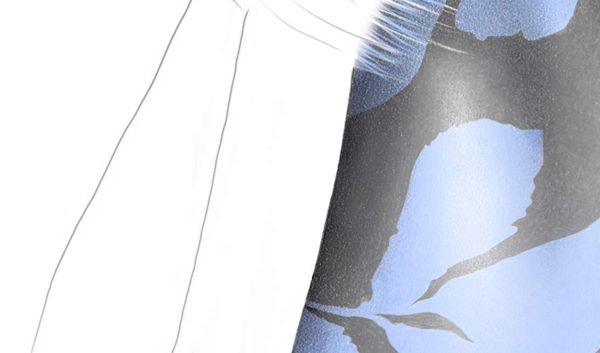
Drawing the Clothes - Step 1
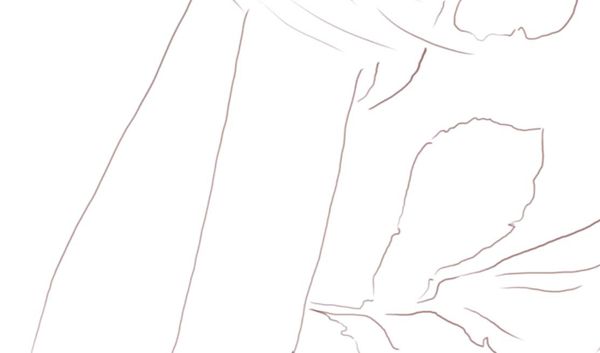
Draw the Details in Line
We begin by drawing the clothes in line alone to establish any folds and patterns that we see in the fabrics.
-
This gives us a simple framework upon which we can build up color and tone to shape their form.
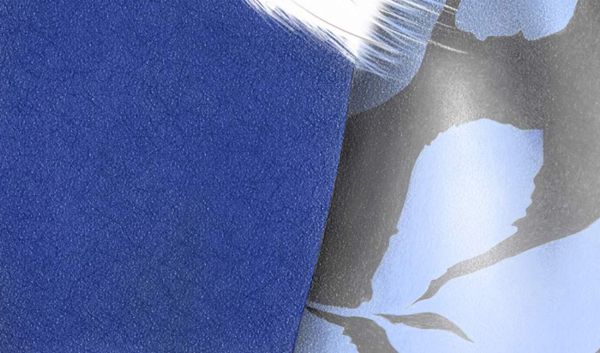
Drawing the Clothes - Step 2
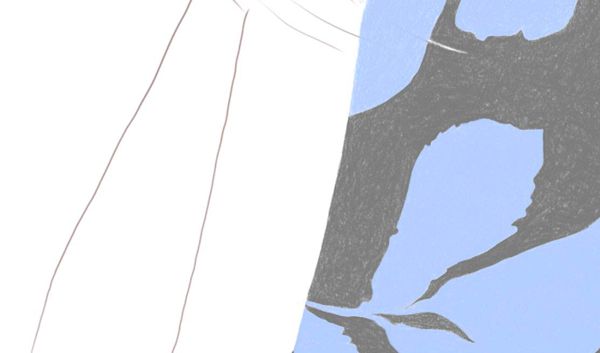
Shade any Pattern with Flat Colors
Next we shade in the two color dress pattern with flat even colors: a mid-grey and a light blue.
-
These will provide a foundation on which to build up the form of this fabric.
Drawing the Clothes - Step 3
Form the Folds with Dark and Light Tones
When we start to shade in the form of our two color surface we have four things to consider:
-
A suitable dark tone for the mid-grey color of the pattern.
-
A suitable light tone for the mid-grey color of the pattern.
-
A suitable dark tone for the light blue color of the pattern.
-
A suitable light tone for the light blue color of the pattern
-
In this drawing we have taken advantage of the transparent qualities of color pencil pigments to help us with our shading. We have used a single tone (a graduating blend of ultramarine and black) to darken both colors of the pattern at the same time.
-
For the highlighted sections of both colors, we have used an eraser to carefully remove pigment and let the white surface of the paper shine through.
-
By treating both colors of the pattern with single dark and light tones, you naturally create a more unified surface across the fabric.
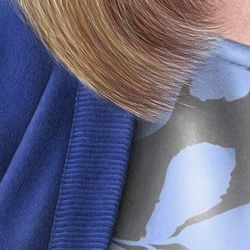
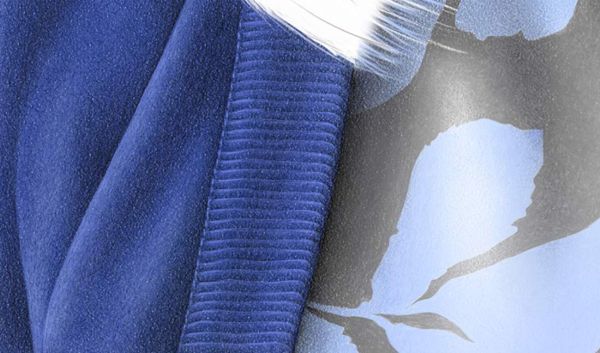
Drawing the Clothes - Step 4
Shade the Cardigan with a Flat Color
The coloring of the cardigan begins with a layer of ultramarine which provides a flat mid-tone.
-
This cardigan was shaded using the side of the color pencil core rather than the point. This technique lets you to pick up the natural texture of the paper which replicates the soft feel of the wool fabric.
Drawing the Clothes - Step 5
Form the Folds with Dark and Light Tones
To create the light and dark tones of the cardigan we used light blue and Prussian blue color pencils respectively.
-
In order to increase their level of contrast, some of the darkest areas are deepened with a hint of black, while the lightest are highlighted with a tint of white.
-
Black was also useful in creating the soft 'sfumato' shadow between the cardigan and the dress.
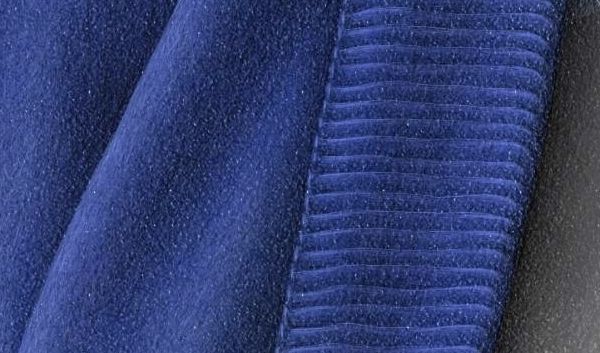
Detail of stitching
Earlier, and in other pages of this tutorial, we have mentioned the benefits of using an eraser to establish the light tones in a color pencil drawing. In this case the amount of stitching detail that we had to draw exceeded the drawing capabilities of even the sharpest eraser and had to be done with a pencil.
-
There are, however, some fine lines in the middle of the ribbed edge which have been scratched in using a very sharp craft blade.